This post may contain affiliate links, which means that if you make a purchase, I might make a small commission at no extra charge to you.
How to Paint a Geometric Mountain Mural
I knew I wanted to do an adventure-themed nursery even before I was pregnant with Iris. I really didn’t want to know the sex of the baby beforehand, but Damian did, so I caved. We found out, but didn’t tell anyone until she was born. Because of the theme a lot of people thought I was having a boy, but I think it’s a great gender-neutral nursery theme. There are tons of awesome ideas for this theme and similarly-styled walls on Pinterest, so I had some idea boards of what I wanted, but overall I kind of just went with it once I started.
I used leftover paint for this project, so it was really budget friendly, but even if you have to purchase paint it is still a fairly inexpensive project. I love painting – it is one of the most affordable ways to transform a space in a short amount of time. The room we turned into the nursery was our office, which was already painted the medium grey color we have throughout our house. For the mountains I used a light grey paint leftover from our hallway and a charcoal grey left over from a small accent wall in our kitchen.
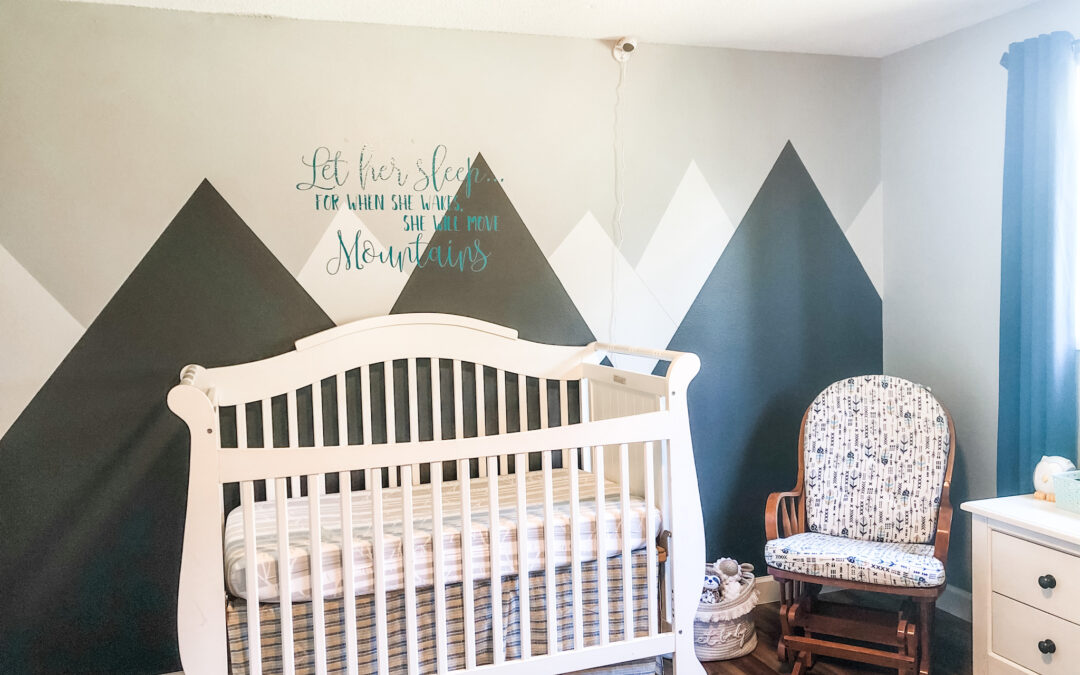
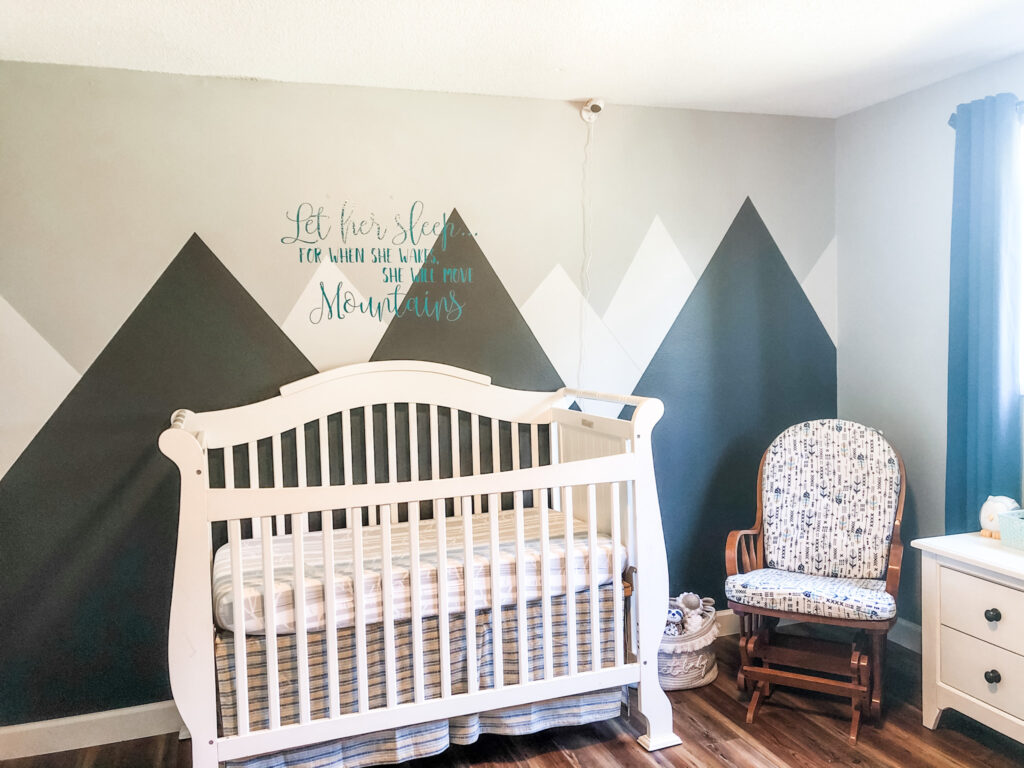
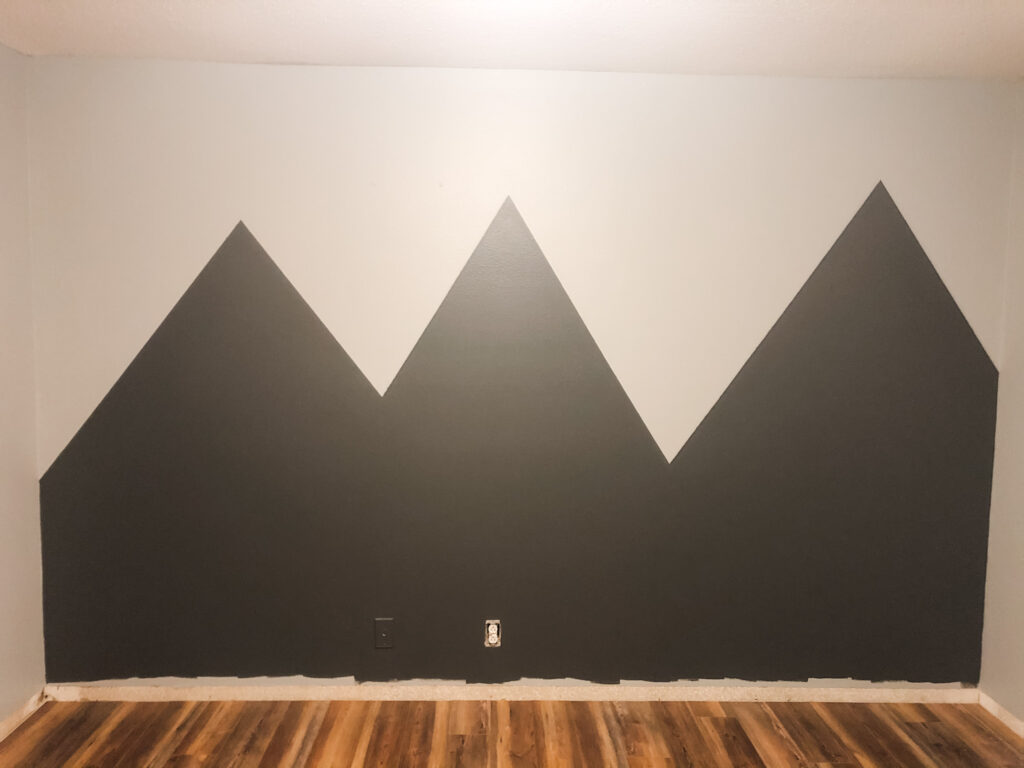
I promise, this is a super simple DIY and it’s much cheaper than purchasing a full wall decal, and probably easier – wallpaper is no small task! Here is what it looked like when I finished:
Getting Started
Here is what you’ll need:
- Three Colors of Paint, your choice, but I used:
- Light Grey: Valspar Signature Bay Waves in Eggshell Finish
- Medium Grey: Valspar Signature Polished Silver in Eggshell Finish
- Dark Grey: Valspar Signature Muted Ebony in Eggshell Finish
- Painters Tape
- Angled Paint Brush
- Small Craft Paintbrush
- Large Paint Roller
- Small Paint Roller
- Box Cutter or Craft Knife
If you’re starting from scratch you could do any combo you wanted, I think a charcoal grey base with the two lighter colors for mountains would be cool.
Painting Your Mural
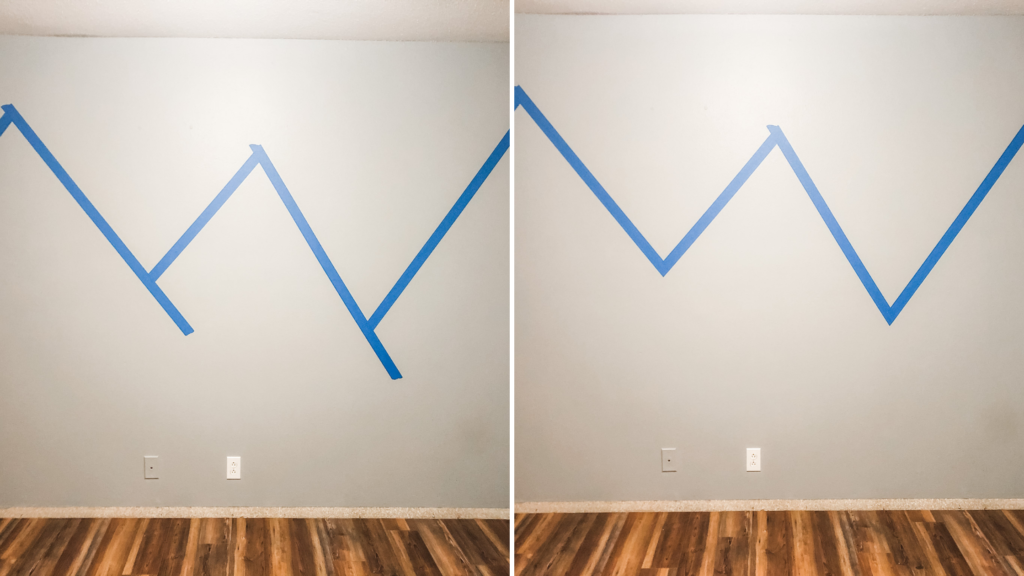
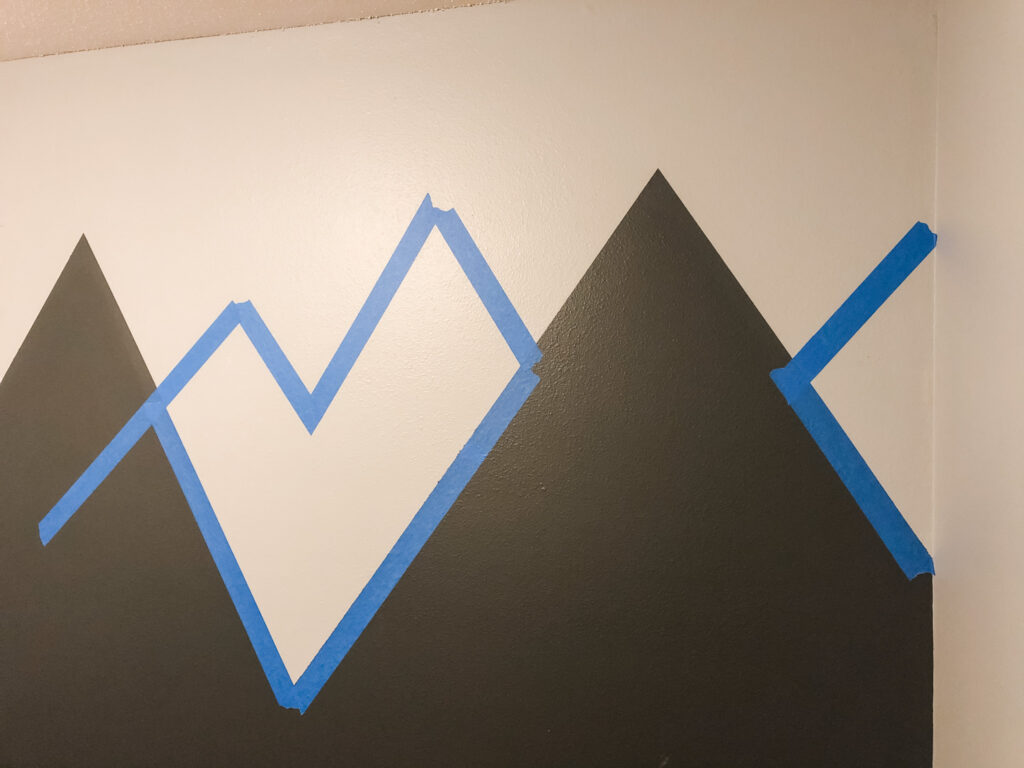
Once your base color is on, get your painters tape and begin with the large (forefront) mountains first. This did take me a couple of attempts to decide exactly where I wanted the mountains,. When I decided I liked where they were, I carefully cut any areas where the tape went down into the area I knew I would be painting with a box cutter. Then, I used a damp washcloth to “set” the painters tape by running it over the seams and pressing. I’m going to add a disclaimer here that I despise painters tape, I personally am able to keep a steady enough hand for most painting jobs that I prefer not to use it if I’m just doing a wall or something, but if you’re going for a more geometric look like I was, you’ll want to use it. You can see in the photo that I didn’t tape off the corners, I just free-handed them, but if you’re a person who needs the tape, definitely add it along the corners as well.
I did my largest mountains in charcoal so next I painted the edges and around the outlets and cut in the corners with my large paintbrush and then rolled the rest with my large roller. I love Valspar Signature Paint and Primer in one, but even with the primer in the paint this dark color required two coats.
Next, I started on the smaller peaks after the two coats of paint were completely dry on the larger mountains. I just played around with the angles until it looked right to me. The smaller areas took more trial and error than the larger one. Make sure you also put a line of tape on top of the charcoal along the edges where it meets the area you are about to paint. Repeat as before with your edges and then filling in, this time with a smaller roller. I tried a foam roller the first time and it didn’t mix well with my wall texture so I used one like linked above instead and had much better results.
TIP: Remove your tape while the paint is still at least partially wet. This will prevent the paint from peeling off with the tape when it dries.
Final Touch Ups
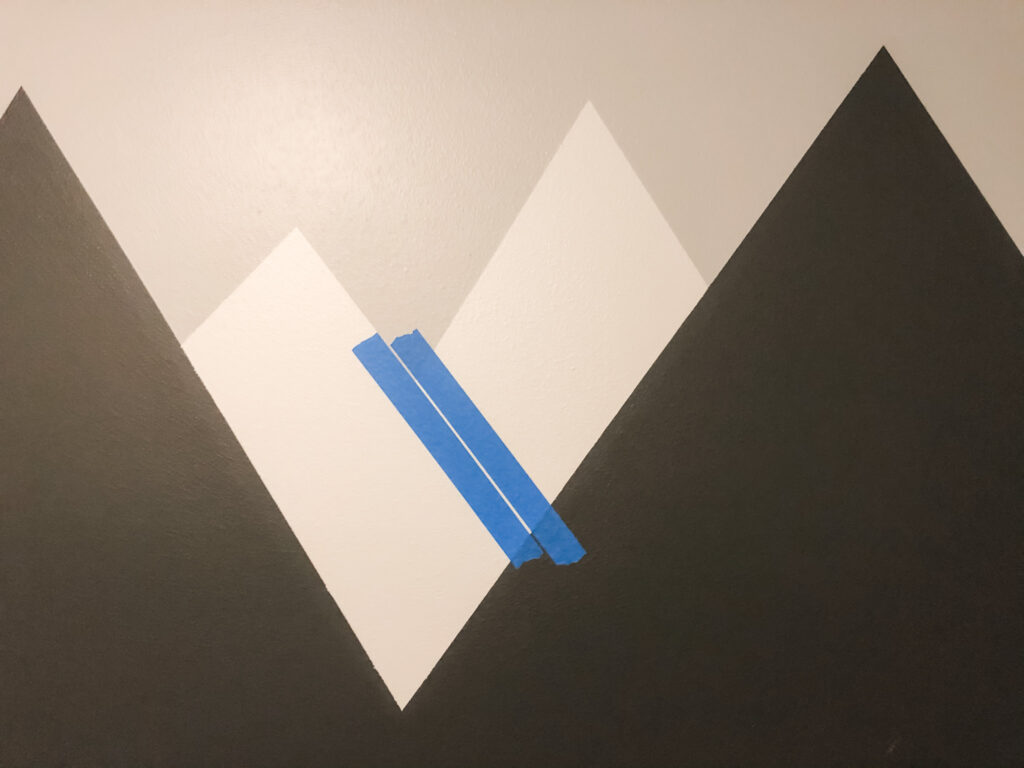
Afterward I thought the area I chose to do two peaks on looked weird so I taped off a thin line along the “edge” of one of the peaks and used my small craft paintbrush to paint the medium grey as a divider between the two mountain peaks.
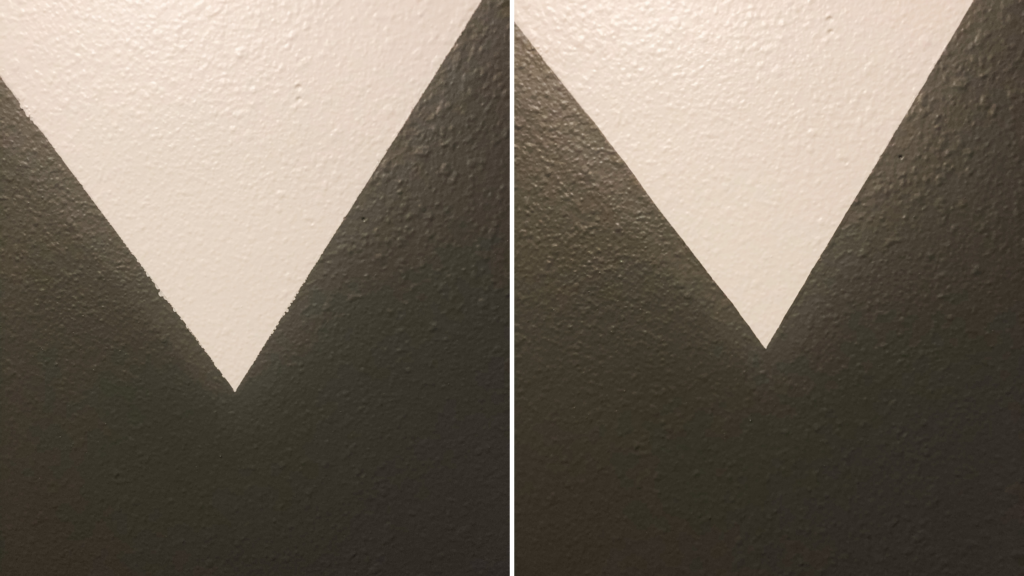
The last thing I did was take my small craft paintbrush to touch up the edges where any paint had bled through the painters tape (why I hate painters tape, but here we are). I added a final touch by getting a large wall decal off Etsy to put above the crib. Since nobody knew the sex of the baby beforehand we had planned to put the decal up the night before my c-section, but baby had other plans (that’s a story for another time) and the decal went up after she arrived.

What do you think? Could you tackle this project? Have you done anything similar?